Whole House Humidifier Installation
|
|||
|
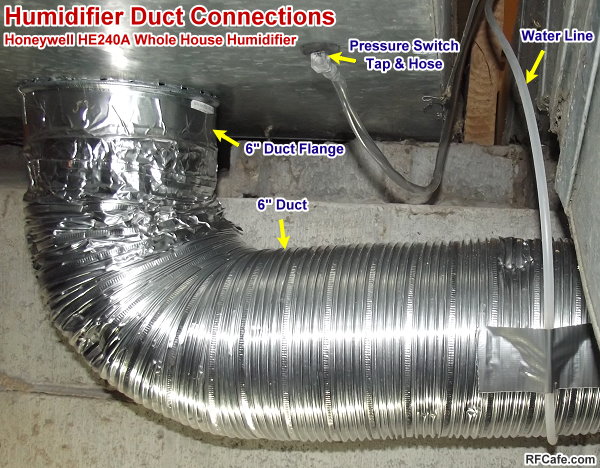
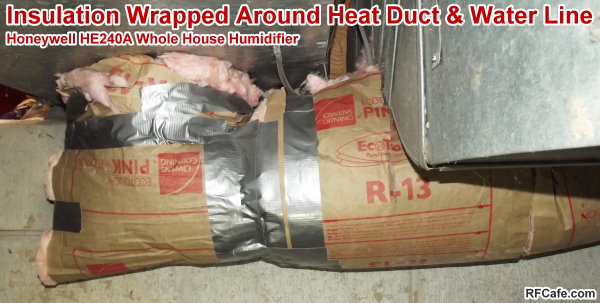
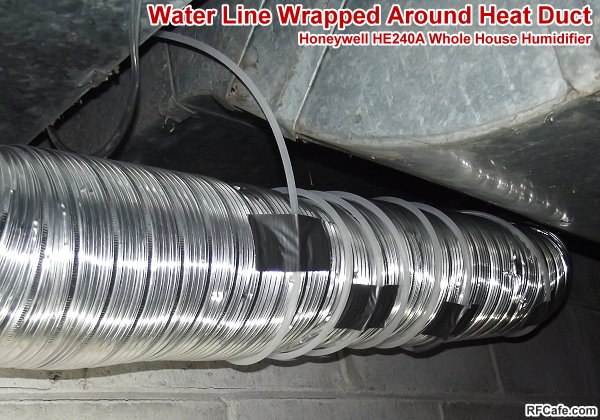
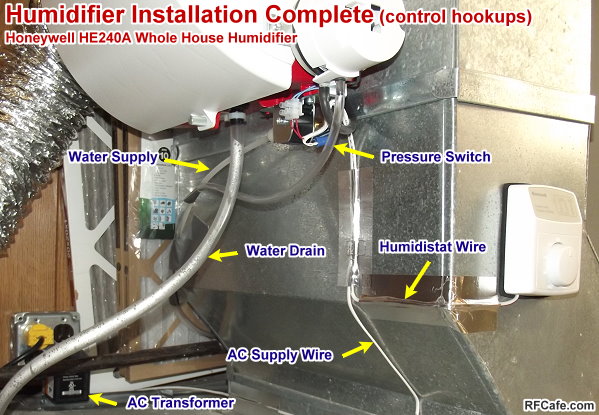
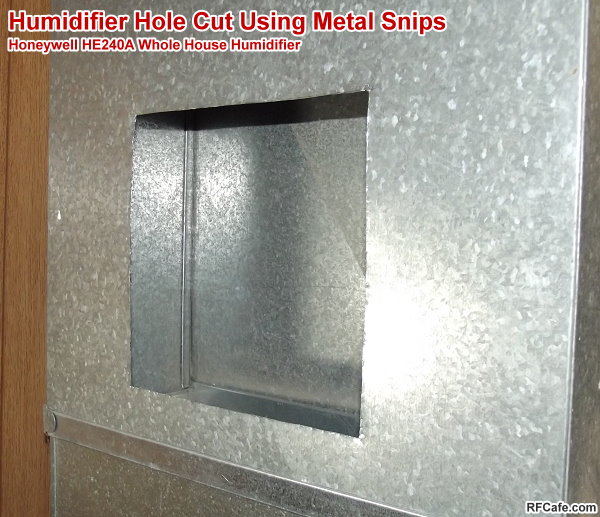
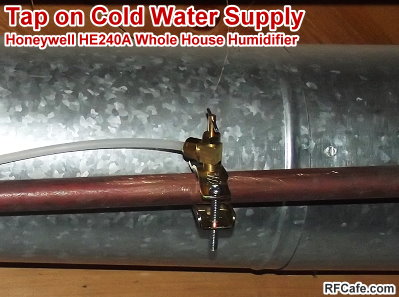
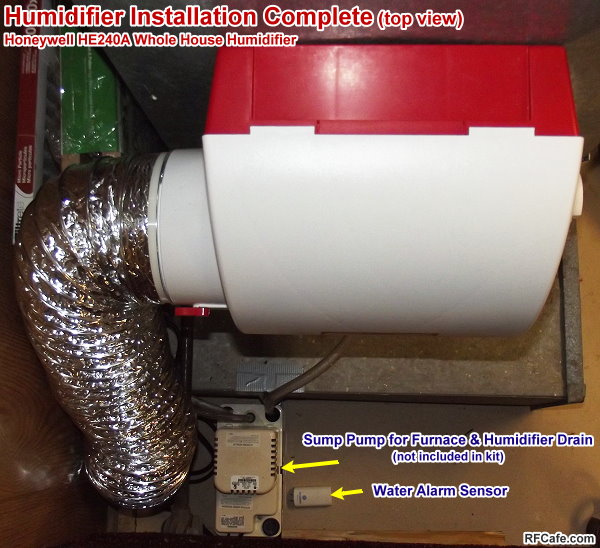
The only way to mitigate low humidity conditions is to add water back into the air. One way is to use a free-standing humidifier that either evaporates water back into the air or to use an ultrasonic humidifier that blows a fine water mist into the air, which then evaporates. Ultrasonic types tend to put more water back into the air, but if you have a high chemical content in your water - such as lime or calcium - you will soon find a layer of dust deposited on everything in your house. It lays on top of horizontal surfaces and electrostatically clings to the sides of glass and plastic - an utter mess! Evaporative humidifiers do not have that problem since the heavy, non-evaporative elements never leave the unit. Instead, they collect on the filter/dispersion grid. Cleaning or replacement is needed, but at least the crud is not all over everything else. You can buy free-standing humidifiers of both types that have water supply line hookups with valves that regulate water inflow, but you need to have them located near a supply line. Regardless of the type, you will be listening to fans blowing all day and night long. The preferred option, IMHO, is to install a whole-house humidifier that resides on the furnace ductwork, has its own regulated water supply, and is controlled by a humidistat. After a couple weeks of refilling three free-standing humidifiers two to three times a day and listening to the fans, I decided it would be worth the expense and effort to install a whole-house humidifier. The free-standing units cost $60 at Walmart ($180 total), and the Honeywell HE240A whole-house humidifier with a couple additional parts cost a total of around $225 at Home Depot. I already had the small sump pump to handle the water drain, so that saved me $40. I could have run the drain line into the garage floor drain, but that would have looked bad. So, after about six hours of installation time and an additional $50, I now have an automatic humidifier that waters itself and probably adds at least $225 of resale value to my house. The three free-standing units, which would have no resale value, were cleaned and returned to Walmart for a full refund. Installation is very simple if you have all the needed tools, which I did. Instructions called for a 3/4" diameter metal drill, but I instead marked off a 3/4" hole and drilled around the perimeter with a 3/32" bit and filed the edges smooth. Because of the vertical downward flow of my furnace, I needed to mount the humidifier unit on the return air duct. Here are a few photos of the installation in case you want to try a similar installation for yourself. I'm guessing anyone who reads this, being an RF Cafe visitor, will have no problem. Note: High efficiency fuel-fired furnaces generate water in the exhaust due to condensation from the air. It is the same process that condenses air in your air conditioner. It needs to be drained properly. Mine originally drained into the soil under the house, but I re-routed it into the sump pump used for the humidifier drain. BTW, my furnace uses natural gas - the cheapest of all fuel sources these days. I pity those who use oil, LP, or propane!
Posted August 5, 2021 |
|||