|
|||||||||||||
 |
|||||||||||||
Necessity Is the Mother of Invention
|
|||||||||||||
|
1 | 2 | 3 | 4 | 5 | 6 | 7 | 8 | 9 | 10 | 11 | 12 | 13 | 14 | 15 | 16 | 17 | 18 | 19 | 20 | 21 | 22 | 23 | 24 | 25 | 26 | 27 | 28 | 29 | 30 | 31 | 32 | 33 | 34 | 35 | 36 | 37
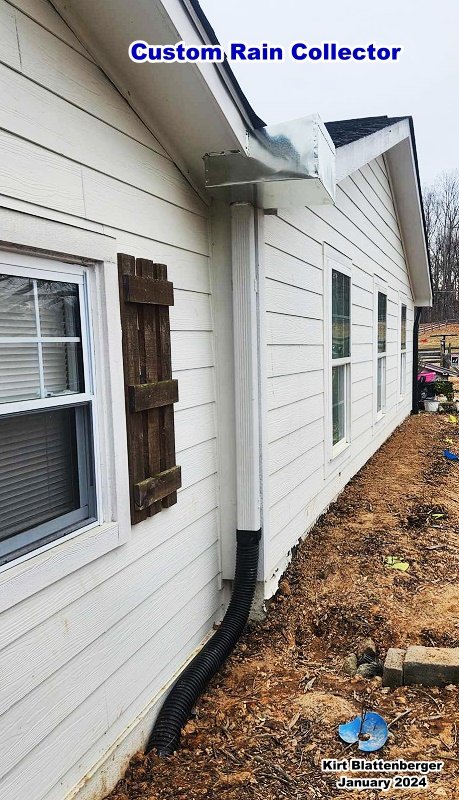
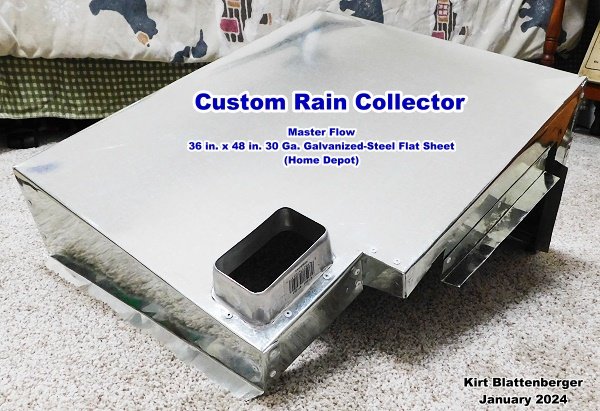
Custom-made rain collector. It will get painted white when the weather gets warmer. Nobody can say for sure where the saying originated, but the veracity of "Necessity is the mother of invention," has been evident throughout all of mankind's existence. You have doubtless experienced it in your own life many times, sometimes in small ways and sometimes in big ways. We cannot all be as prolific at invention as were Archimedes, Benjamin Franklin, and Thomas Edison, but if when the need arises and no ready solution is available, you do it yourself or do without. Such was the case recently when my daughter's house was experiencing massive water infiltration during major rain downpours. The previous owners had buried a drain pipe in the ground where the rain ran off, but by now it was almost entirely blocked off with dirt. I could have dug up and replaced the blocked portion, which was for at least four feet, but there was no telling how much blockage there might be farther downstream, and the pipe runs at least 80 feet to where it empties out between two buildings - not a good plan. Instead, I dug a new trench along the entire length of the house and fed the two corner down spouts into it along with the new collector in the middle. One corner downspout also emptied into a clogged drain pipe, and the other just ran onto the top of the ground. Like I said - bad planning.
South-looking view of house showing original gutter and downspout configuration.
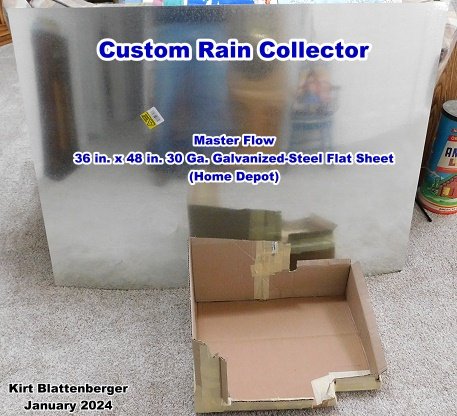
Rain collector cardboard prototype and galvanized sheet metal.
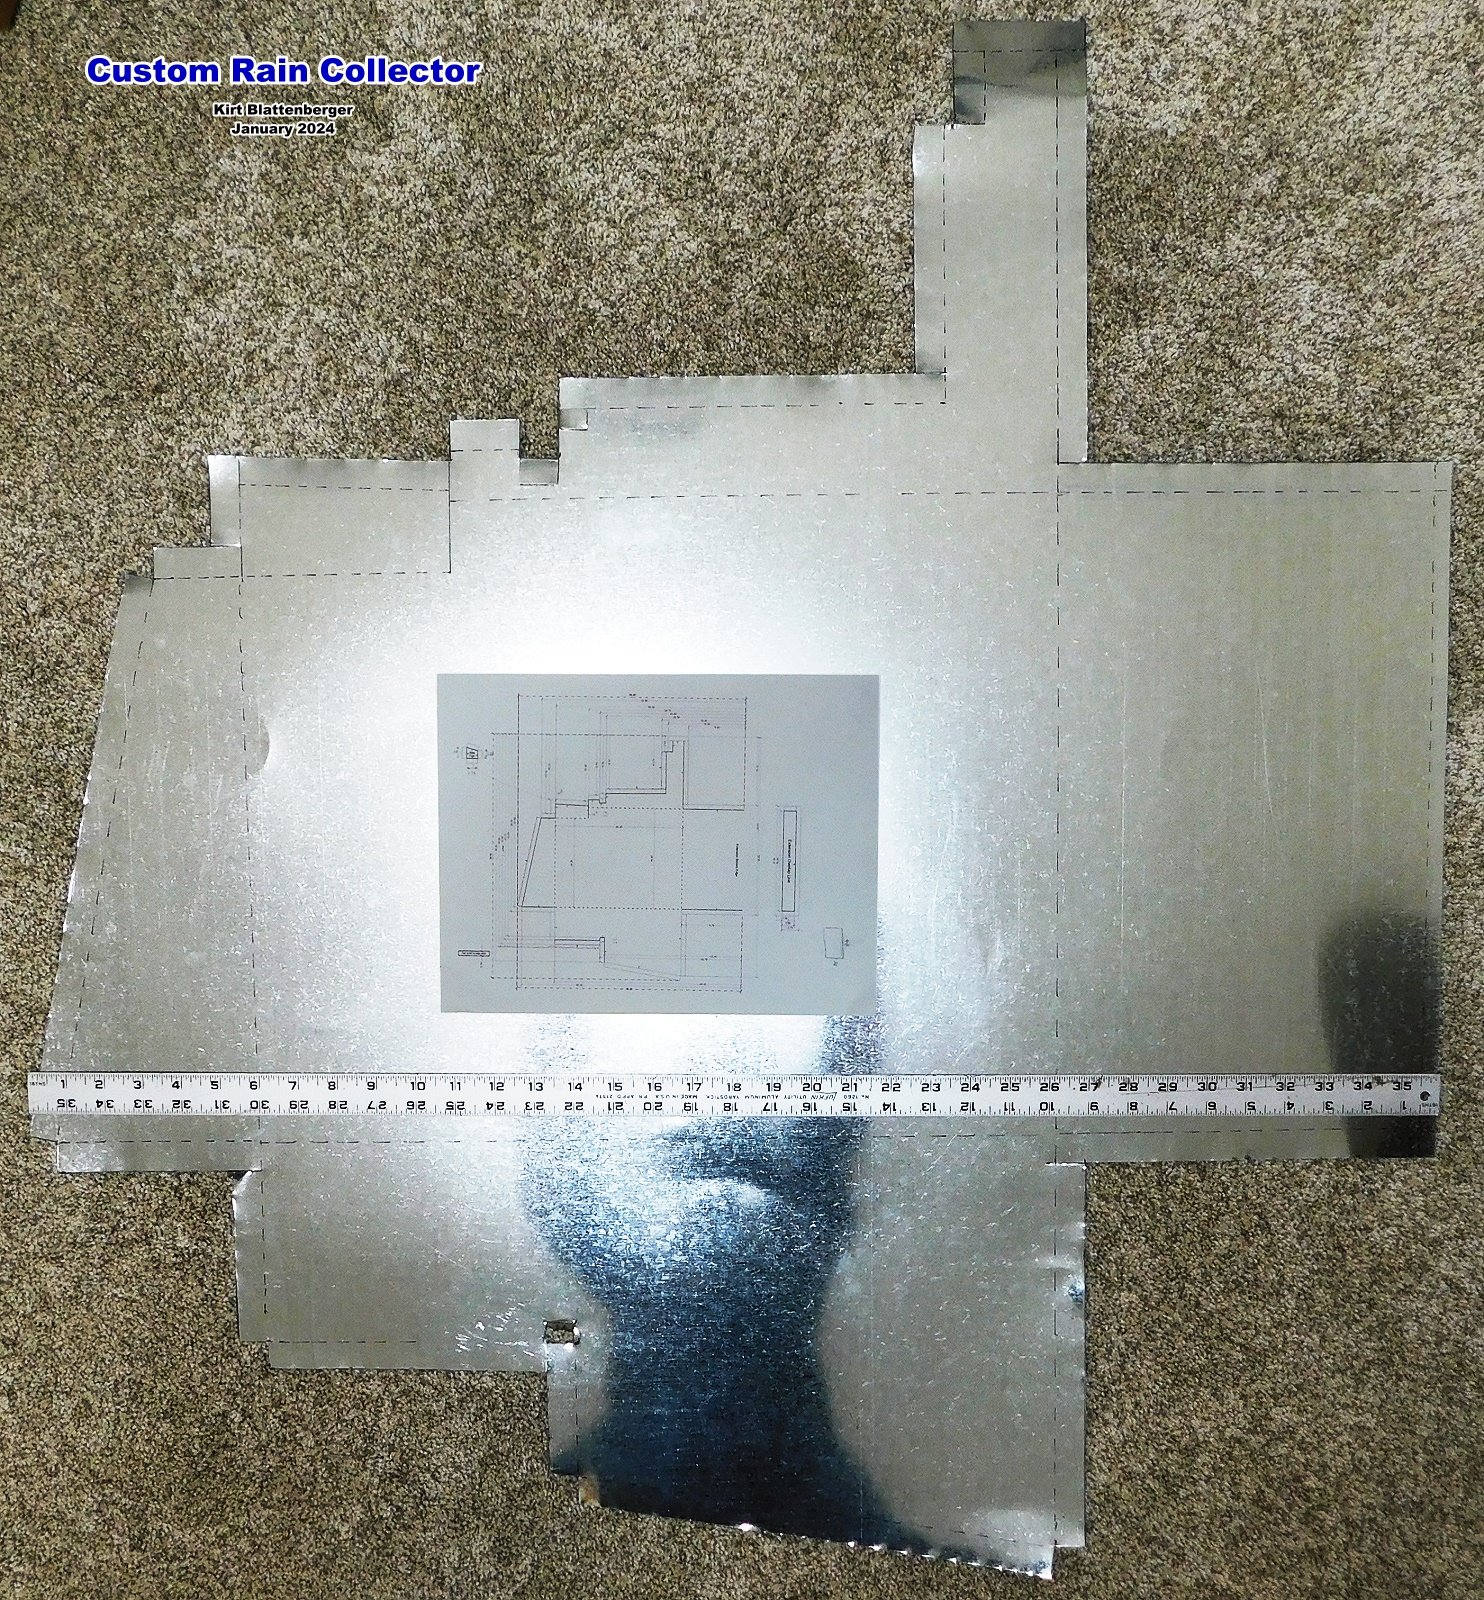
30-gauge galvanized steel template cut and ready for folding.
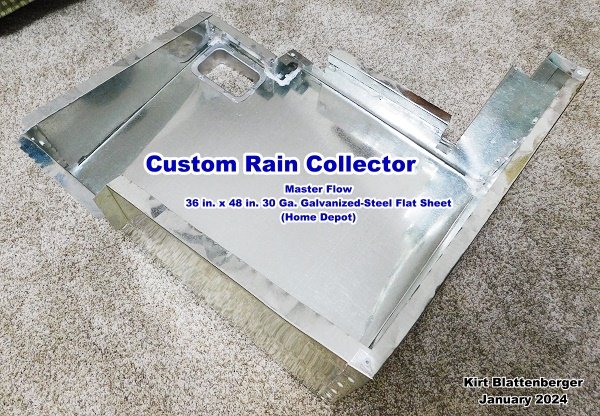
Completed rain collector inside, top view.
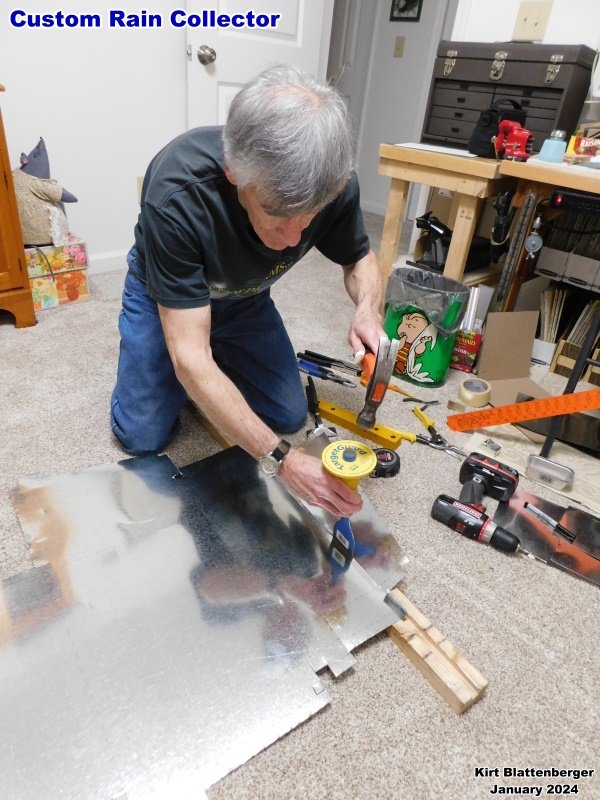
Completed rain collector outside, bottom view. As can be seen in the photos, where the roof sections converge to form a valley, there is no effective way to install traditional gutters. During a heavy rain, the water runs off with such force that it shoots out a foot past the edge. All that water was seeping into the ground and into the house. The floor below the three most distant windows is about three feet below grade level, with nowhere to go. Beyond the far edge of the house is a three foot retaining wall that traps the water, too. As I said, it was very poorly planned. Because the roof sections do not converge at the same place, a very complex shape was required for the rain collector. Also, it needed to be high enough to capture the significant flow past the edges. Rather than suffer through trial and error with sheet metal, I first measured and cut a prototype out of corrugated cardboard. That way I could assure all the angles and surface contact areas were correct and fit snugly. Satisfied with the result, I generated an "unfolded, flattened out" dimensioned scale drawing (using Visio) for transferring to the 30-gauge galvanized sheet metal. Outline cut (solid) and bend (dashed) lines were used, along with arrows to remind me of which way to make each bend. Only one small corner section needed to be fabricated separately. I was surprised to discover how large of a piece of metal was needed. The largest piece sold by Home Depot was 36" x 48", and that was about 3" too short in one dimension, so I had to attach an extension strip on one edge. After transferring the pattern to the sheet metal, tin snips were used to cut the outline and fold tabs. The first thing to do was attach the extension piece. Folded, interlocking seams were used where practical. Gutter seam sealant was used at all joints. 1/8" steel pop rivets were used everywhere in order to minimize the opportunity for dissimilar metal corrosion. Next, a broad-faced cold chisel was carefully hammered along the bend lines in order to obtain straight lines with a small radius. Only a few degrees of bend was needed to establish the line, then hand bending completed the 90° angles. All corner seams were overlapped for strength and optimal sealing. Once bending was complete, holes were drilled for all the rivets, using a few 4-40 nuts and bolts to hold things temporarily. The rain collector was trial-fitted in place, and only a couple minor adjustments were needed for the flanges that would be used to mount it to the fascia and eaves. I also verified the location for the downspout adapter. Sufficient gutter seam sealant was applied to all the joint areas to assure a leak-proof joint, and then the pop rivets were installed. A cutout was made for the downspout adapter and it was similarly installed with sealant and rivets. Care was taken to wipe off excess sealant to have a nice clean, finished product. After giving the sealant a day to set, the rain collector was installed and connected with downspout into the newly installed drain pipe. As the photos show, it fits like a glove. Once the weather warms up a bit, I'll take the rain collector down and paint it white. The drain pipe (solid wall, not perforated wall) runs out to the entrance road with a sufficient downslope to assure excellent drainage. About two weeks later we had another downpour, so I got in the car and drove over to the pipe exit and watched a torrent of water gush from the opening. No water had entered the house since that time. Check. Another "Dad" job done!
Using chisel to define bend lines in sheet metal.
Posted February 8, 2024 |
|||||||||||||
 |
|||||||||||||
|
|||||||||||||
 "
"


|
||||||||||||||||||||||||||||||||||||