|
|||||||||||||
 |
|||||||||||||
How to Solder
|
|||||||||||||
AI-enhanced version of image below. Proper soldering is almost as much of an art form as it is a technical skill. Having been through numerous soldering classes in my career, starting with electrical vocational courses in high school, then again in USAF technical school, and other times while working as a technician and engineer, I always exercise care in making solder joints. Proper preparation - including both tinning of mating surfaces and a means to prevent the joint members from moving during cool-down - is of utmost importance for assuring a nice, smooth, shiny joint with just the right amount of solder. Lead-free solders do not tend to produce the level of shininess as do the good old 60-40 type tin-lead solders, but you can still make a nice looking joint. This might be more information than you want to know about me, but I even strive for perfection in solder joints in copper pipes and fittings used in plumbing work. Call me a masochist, eco-villain, or worse, but I still use PbSn solder for plumbing joints just to get the shiny joints! How to Solder
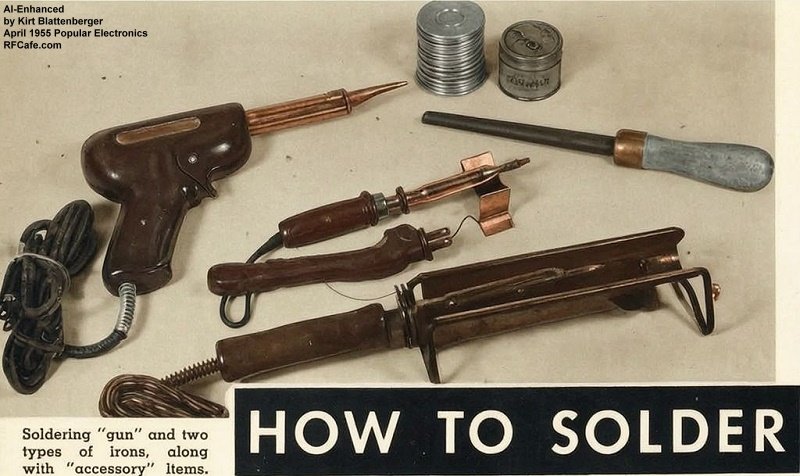
Soldering "gun" and two types of irons, along with "accessory" items. Poorly soldered connections are often responsible for poorly functioning and inoperative equipment. Since good soldering is actually easier to do than poor soldering the amateur should do three things: he should follow the basic rules of good soldering, he should learn the difference between a poorly soldered joint and a good one, and he should practice soldering different types of connections until he acquires the "feel" of his iron. The ten rules for good soldering are: Select the right equipment for the job: Essential soldering tools include a soldering "gun" or soldering iron and stand, solder, paste flux, and a file. Care should be taken to select an iron suited to the work. Too large an iron may be hard to handle and may deliver too much heat, burning the insulation. Too small an iron, on the other hand, may not deliver enough heat to the work, making it impossible to flow solder into the joint. A 60 to 100 watt iron with a 1/4" to 3/8" pyramid tip is best for most radio and electronic work. However, for work with hearing aids, miniature radios, remote control equipment, and similar small items using fine wire, a 25 to 50 watt iron or soldering "pencil" is preferred. On the other hand, for work involving large wire and considerable soldering to a chassis, a 150 to 250 watt iron may be required.
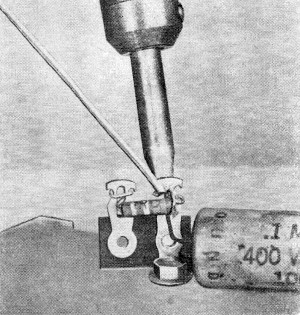
Correct soldering technique. The iron is held against part until hot enough to melt solder when applied to heated junction.
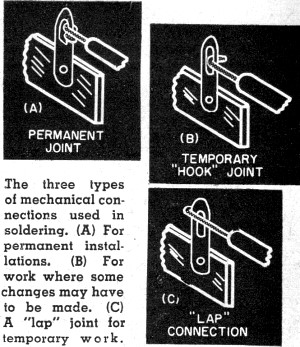
The three types of mechanical connections used in soldering. (A) For permanent installations. (B) For work where some changes may have to be made. (C) A "lap" joint for temporary work.
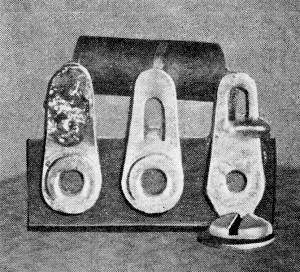
Correctly (right) and incorrectly (left) soldered connections. The latter type can cause electrical and mechanical troubles. Soldering "guns," while more expensive than irons, are easier to use, use less power since they consume power only when in actual use, require virtually no warm-up time, have a small tip suitable for radio wiring, and, generally, have small lamps which spotlight the work. A 100 to 150 watt soldering gun is a good choice for electronic work. Solder is available in many grades and in two types, wire and bar. The most popular grades are 40-60, 50-50, and 60-40. The first figure refers to the percentage of tin and the second to the percentage of lead in the alloy. In general, the higher the percentage of tin, the lower the required soldering temperature. For radio and electronic work, 50-50 or 60-40 wire solder with a rosin core is recommended. Never use acid core solder in electronic wiring. Fluxes are used to remove the thin film of oxidized metal that forms on the surface of the work as well as to prevent additional oxidation when the metal is heated prior to soldering. Although flux core solder is used for most wiring, a small can of paste flux is handy to have around for tinning leads, tinning the iron tip, and similar work. Use a non-corrosive flux. A small fine-cut file should be available for removing pits and smoothing the tips of soldering irons. The file should not be used unless the copper tip of the iron is pitted and then only enough of the metal should be filed away to leave a smooth, shiny surface.
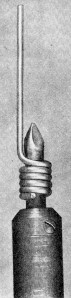
For tight spots, an "extension" can be added to soldering iron by means of copper bus bar. Clean the metals to be soldered: All grease, dirt, corrosion, or enamel must be removed from the surface of the metal prior to soldering. Use steel wool, sandpaper, a file, a knife, wire brush, or any similar tool to remove the dirt and grease. Keep the soldering iron tip clean and well tinned: If the tip of the iron is not clean, the film of oxidation formed will act as insulation and prevent the proper conduction of heat to the joint. To tin an iron, first make sure the tip is free from corrosion and pits. If the tip is badly pitted, it will have to be filed. Allow the iron to heat until its tip is hot enough to melt solder then flow solder over the end of the tip. In some cases it may be necessary to rub the tip against a metal plate (such as the top of a tin can), applying a little solder as this is done. Finally, wipe off excess solder with a heavy cloth, leaving the tip bright and shiny. Don't tin the entire tip: When using the iron, occasionally check for proper tinning. Try to keep a thin film of solder on the tip of the iron at all times. Heat the joint, not the solder: To solder a joint, hold the tip of the iron against the joint until the joint is hot enough to melt the solder - then apply the solder to the joint. Don't try to solder unless the iron is really hot: Make sure the iron is hot enough to melt solder instantly when it is touched to the tip before trying to solder a joint. Let the heat do the work. Apply only enough pressure to the work so that good contact is made between the iron tip and the joint. Then solder quickly. |
|||||||||||||
 |
|||||||||||||
|
|||||||||||||

|
||||||||||||||||||||||||||||||||||||