|
|||||||||||||
 |
|||||||||||||
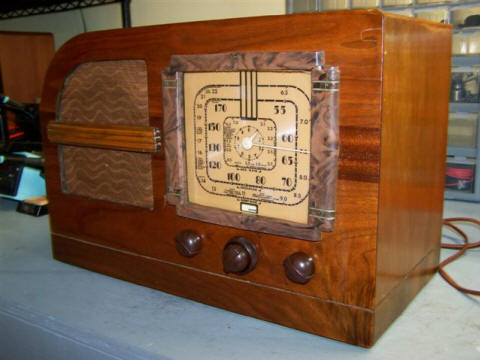
Rebuilding an RCA 86T Antique Radio
|
|||||||||||||
|
RCS 86T Antique Radio
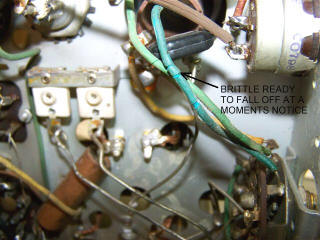
Brittle Wire Insulation
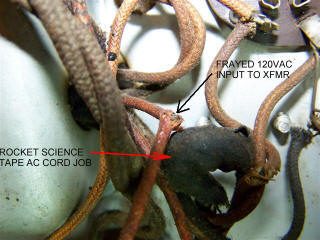
Crappy Tape Repair, Frayed Wire
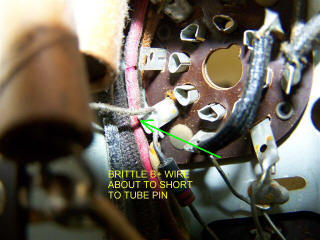
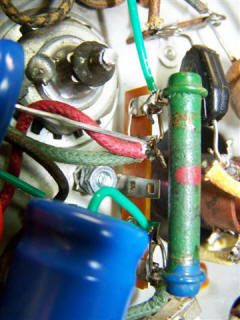
Brittle Insulation Near Tube Pin
Dried Out Old Filter Capacitor
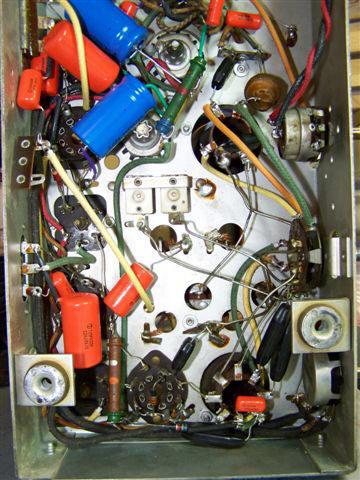
Chassis Components
Chassis Components
New Wiring & Capacitors
Point-to-Point Wiring (the good old days?)
Modern Wire Substituted for the Old Crusty Stuff
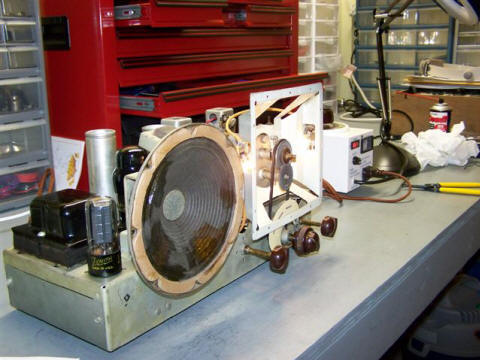
A View Only the True Aficionado Can Appreciate!
Note the Belt-Driven Dial Pointer (dial missing)
A Bob Davis Restoration Original
RCA 86T Antique Radio Many thanks to long-time RF Cafe visitor Bob Davis for submitting this article on his restoration of an RCA 86T antique radio. Bob is an RF engineer who works in the remote utility meter reading field. He is an avid collector and refurbisher of antique radio equipment in his spare time. You can see some of his radios on the Radio & Electronics Restoration Projects page. You are welcome to submit photos of your own projects for publishing. Here are Bob's restoration stories for his Midland and Lloyds shortwave radio, his RCA 86T, and a few other radio restoration projects. I bought this RCA 86T radio from a garage sale, the cabinet was in pretty good shape and I needed a winter project. Putting the radio on my dim bulb test rig showed no horrible shorts, so I went for it and brought it up using a variac. The old girl came to life with substantial hum but brought in WWL on the AM band (I live close to New Orleans). Removing the chassis from the cabinet, several hours of cleaning took 70 years of dust and grime off if it. I removed all the tubes, which luckily all tested well, cleaned them, wrapped them in paper towels, and stored them safely until the chassis was rebuilt. Inspection of the wiring in the chassis found many rubber insulation covered wires where the insulation was crumbling requiring replacement of the wires. This is a step sometimes missed by amateurs rebuilding such sets and is an important one if one doesn't want the house burning down. A few pictures follow showing some of the bad wiring and some dubious repairs made to the set over its 70+ year lifetime. Further inspection showed the culprit for all the hum when I turned the radio on. All the larger electrolytic capacitors had dried up and were ready to short their center pins to the ground system of the radio. One example is below. Taking a few digital pictures before I started the re-wiring process was in order as one is worth a thousand words as they say. I also hand sketched several areas of the wiring for further reference as the point to point wiring of the chassis in places was complex. I then researched the radio on the internet and was lucky enough to find an original RCA service manual for the set containing detailed chassis wiring drawings and service information. The Nostalgia Air web site was then visited allowing me to download the Rider's manuals for the set (if you use this site, send the webmaster a few bucks, donations keep this site up for us all). Where does one start with a project like this, I figured work from one side to the other. The cap below the volume control looked like a good place to start. Taking the volume control off also allowed me to clean it up with some DeOxIt. Let the carnage begin! The black parts are all mica capacitors that didn't need to be replaced. Note the amount of disassembly needed to get to the old wax paper caps to replace them. A few notes.
The volume control areas shown above after re-work. Note the replacement cloth covered wiring just to “make it pretty”.
All Spiffed Up with New Components The power supply side of the chassis. Note the terminal strips installed to attach the point to point wiring parts that used to be connected to the electrolytic capacitors. Note also that the transformer wires were covered with heat shrink tubing as needed for safety. Safety first, the following pictures show the detail of the additional terminal strips added.
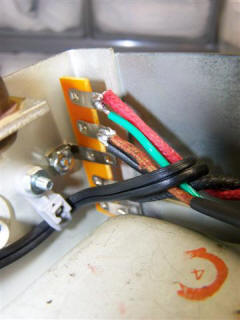
A Safer Radio
All Cleaned This radio had a very dangerously wired (and strain relieved) AC power cord connection. The addition of a terminal strip and proper strain relieving under the chassis makes it safe for the next 70 years. I like to dress the AC input cord away from the hot portions of the radio like the dropping resistor network used for this radios B+ voltage generation. See picture below. One more shot of the completed build point to point wiring (I like to use quality parts). I had a lot of time in this radio when I was finished, but I don't rebuild these to make a buck, I do it because I like to! A little hint, order some Teflon coated wire and strip off the insulation as needed for spaghetti insulation. It works great and won't melt on you! Note the reproduction cloth wire used in the picture above, Radio Daze is a great source for the wire. All done, time to put the final polish on the chassis, and string the new dial cord. I used a dial belt for this one as it worked better. You can buy a kit from Radio Daze that works great for this. The old speaker shown in the picture has had a few tears over the years that were repaired. I did a few myself, it sounded OK when I finished, I'll leave a re-cone of that to the person who buys my estate stash some day ;-). Time to install all the tubes, do one more check of the wiring, hook it up to the Variac and cross my fingers. Fired right up! Here she is all done with a clean chassis with the tubes lit up…
A Bird's Eye View - Born Again! I connected an antenna to the radio and all bands played well. No hum heard at all thanks to the new electrolytic caps. Note that I left the old electrolytic cans in place to maintain the look of the top of the chassis. A few hours with my trusty old HP 8640B signal generator, HP 8614 Network Analyzer, and R&S FSP spec an and she tuned up beautifully (hey, I AM an RF guy by day). Back in the chassis with a reproduction cloth covered AC cord just for looks. I took the liberty of signing my work, what the heck? All done, polished up, ready to play for another 70 years, if they keep the shortwave band active for that long! I'll leave the cabinet alone, I hope I only have a scratch or two on me after 70 years, and I'm an RF guy and not a woodworker ;-) There you have it, an old radio, over 100 hours of fun and toil, and another one comes back from the grave. I want to get an RCA reproduction logo from Radio Daze to finish the front panel to ice the cake!Before I close, let me say that safely rebuilding these old sets takes a little time, but is worth it for the peace of mind one gets by switching them on and knowing that you won't be calling State Farm for a fire claim. Be careful of sets you buy off the internet, at junk shops, or for that matter by some who claim to have restored them. Inspect them well and err on the side of caution if you are unsure of their safety. Have a pro look them over before you plug them in if you can, or buy one from a pro in the first place and save all the trouble unless you like to rebuild them yourself and have the proper tools. A good site that has several talented professionals who restore radios is https://www.radioattic.com. I suggest if you do buy a set off the internet ask the seller for credentials or references, the pros will always be happy to supply them (and should warrant their work!). Rebuilding old radios is a fun and rewarding hobby. If you want to learn more, this site has many good articles and several rebuilds such as this chronicled. I'm sure Phil won't mind me sending you to him. He really knows what he's doing, you can learn a lot from him. https://antiqueradio.org/welcome.htm
Bob Davis
Posted March 2, 2009 |
|||||||||||||
 |
|||||||||||||
|
|||||||||||||


|
||||||||||||||||||||||||||||||||||||